Spooky cookies are the perfect treat for the Halloween season!
ABOUT SPOOKY COOKIES
These spooky cookies are super cute to make for Halloween parties. The sweet and crisp cookie and beautiful icing on top make these cookies the perfect treat to gift your friends and family! You could also prepare the base colors of the cookies in advance and make decorating the faces a fun activity to do with your friends! I made the faces rather cute (so cute it’s scary?), but you can decorate these cookies to make them as spooky as you’d like. The only thing spooky about these cookies is that you won’t be able to stop yourself from eating them all (sorry). The steps to make these spooky cookies is pretty similar to how I made my frosted cookies before, so you can check out that recipe as well if you like!
COMPONENTS OF SPOOKY COOKIES
- ☆ Cookies: This recipe uses a simple cut-out sugar cookie as well as a chocolate flavored cut out sugar cookie as the base. In this recipe, we make less chocolate dough than vanilla dough since we only use it for the bats of the spooky cookies, but if you like, you can make all vanilla, all chocolate, or an even mix of both!
- ☆ Icing: These cookies are frosted using royal icing. You can color the icing however you want to make a variety of designs.
MATERIALS
- ☆ Rolling pin
- If you don’t have a rolling pin, any long cylindrical object you have works as well!
- ☆ Rolling guides
- This is optional, but it will help you keep the thickness of the dough even. If you don’t have any you can also use a ruler or eyeball it!
- ☆ Cookie cutter
- For spooky cookies, you will need cookie cutters in the shape of a pumpkin, ghost, and bat. If, like me, you don’t have any, you can cut out a shape on paper and use a knife to cut around it as a stencil.
INGREDIENTS (+ SUBSTITUTIONS)
This is a basic list and explanation of the key ingredients. For full list and measurements, please scroll down to the recipe below!
COOKIE INGREDIENTS
- ☆ Unsalted butter
- You can use salted, but just omit the added salt later!
- ☆ Powdered sugar
- Powdered sugar blends easier with the butter, making the dough smoother and the resulting cookie more tender. If you don’t have powdered sugar, you can substitute it for granulated sugar at a 1:1 ratio by weight.
- ☆ Egg yolks
- Egg yolks primarily provide fat, making the texture of the butter cookies moist and smooth while adding a rich flavor. Its lower liquid content also makes the cookies more crisp!
- ☆ Vanilla extract
- I like vanilla, but if you’d prefer a different flavor, by all means use it! Additionally, adding the vanilla to the chocolate dough is optional.
- ☆ Salt
- ☆ Cake flour
- We use cake flour for pastries to have a lighter, more delicate texture. If you don’t have any, you can use a mix of all-purpose flour and cornstarch to substitute, by replacing about ⅛ of the required cake flour with cornstarch and ⅞ with all-purpose flour. In this case, about 175g all-purpose flour and about 25g cornstarch can be used in place of 200g cake flour for the vanilla dough, and 82.25g all-purpose flour and 11.75g cornstarch can be used in place of 94g cake flour for the chocolate dough.
- ☆ Cocoa powder
- I used black cocoa powder for the chocolate dough to make the bats black. You can, however, use regular unsweetened cocoa powder instead. The difference between regular cocoa powder and black cocoa powder is that black cocoa powder has been more heavily alkalised. This makes the cocoa powder taste less bitter. Black cocoa powder is even more alkalised than regular dutch processed cocoa powder. Some may find that it doesn’t really taste like chocolate, but I find that it tastes pretty similar to a certain chocolate sandwich cookie. 👀
ICING INGREDIENTS
- ☆ Powdered sugar
- Powdered sugar provides sweetness and structure to the royal icing while acting as a preservative. For icing you need powdered sugar, so if you don’t have any, you can grind granulated sugar in a blender or food processor until very fine. Just make sure to weigh it after blending and store any leftovers.
- ☆ Egg whites
- I used raw egg whites that I separated earlier when using the yolks to make the cookie dough. Please try to use a pasteurized egg if you can so you don’t get sick! Additionally, if you are hesitant to use raw egg whites, you can use meringue powder which consists of dehydrated egg whites and stabilizer.
- ☆ Lemon juice
- The lemon juice whitens and stabilizes the icing while adding a light citrus flavor.
- ☆ Vanilla
- You can use any flavoring to flavor your icing or completely omit it if you like the lemon taste for your cookies.

TIPS FOR MAKING SPOOKY COOKIES
- ☆ If the dough starts to warm up and becomes soft while you’re working with it, return it to the fridge to let it rest for a few minutes as needed. Also, cold cookie dough holds its shape better in the oven, which is why it’s important to freeze before baking.
- ☆ Depending on the size of your cookies, you may need more or less icing than I wrote in this recipe. I wrote how much was required for when I made it, so please just use this as a general reference and adjust accordingly.
- ☆ In the instructions below, I detail the order in which I decorated the cookies. This was my preference, however, so feel free to go in any way you like. Additionally, feel free to decorate the cookies however you like!
MORE COOKIES RECIPES! ♡
If you recreate this Spooky Cookies recipe, please let me know by tagging me or leaving a comment on Instagram @maruryouri or TikTok @atsuryouri. I’d love to see your creations and hear your feedback!

Spooky Cookies
Equipment
- Rolling Pin
- Rolling guides
- Cookie cutter
Ingredients
Vanilla Cookie Dough
- 100 g unsalted butter
- 80 g powdered sugar
- 2 egg yolks
- ¼ teaspoon vanilla extract
- Pinch of salt
- 200 g cake flour
Chocolate Cookie Dough
- 50 g unsalted butter
- 40 g powdered sugar
- 1 egg yolk
- ⅛ teaspoon vanilla extract optional
- 94 g cake flour
- 6 g cocoa powder
Royal Icing
- 60 g egg whites
- 300 g powdered sugar
- ½ teaspoon lemon juice
- A few drops of vanilla extract
Instructions
- First, we will make the vanilla dough. In a bowl, beat the softened butter with a whisk. Add the powdered sugar and continue to whisk until light and fluffy.
- Next, add the egg yolks and vanilla and whisk until fully incorporated.
- Sift in the flour and fold it in with a silicone spatula, being careful to not overmix. Continue to incorporate the dough together by lightly kneading with your hand.
- Roll the cookie dough between two sheets of parchment paper to 5mm thickness and place it on a cookie sheet or other flat surface in the freezer while we work on the chocolate dough.
- Make the chocolate dough. Follow the same steps to make the vanilla dough. However, because the chocolate dough is a smaller batch, you do not need to knead the dough with your hand. You can simply use the same silicone spatula to bring the dough all together.
- Similarly, roll the chocolate dough between two sheets of parchment paper to 5mm thickness. Switch out the vanilla dough for the chocolate dough in the freezer and let freeze while you cut out the shapes of the vanilla cookies.
- The vanilla dough should now be firm enough to cut out the shapes. Use a cookie cutter or knife to cut out the shapes, then place the cookies onto a cutting board and freeze for 10 minutes or while you cut out the chocolate cookies.
- Repeat the steps for cutting out the cookie shapes for the chocolate dough. Place the chocolate cookies in the freezer with the vanilla cookies and let them all freeze for 10 minutes.
- Arrange the cookies onto a baking sheet lined with parchment paper and bake in an oven at 340°F/170°C for 12-15 minutes or until the edges are lightly golden brown. Allow the cookies to cool completely on a cooling rack.
- While the cookies cool, prepare the icing. In a bowl, mix together the powdered sugar and egg whites using a whisk or hand mixer. Once it’s about half incorporated, add the lemon juice and vanilla and continue to mix until smooth. The icing should be thick but still thin enough to flow freely. If the icing is too thin, let it sit for a couple minutes to dry out. If the icing is too thick, you can add a little bit of water at a time, stirring between each addition until thin.
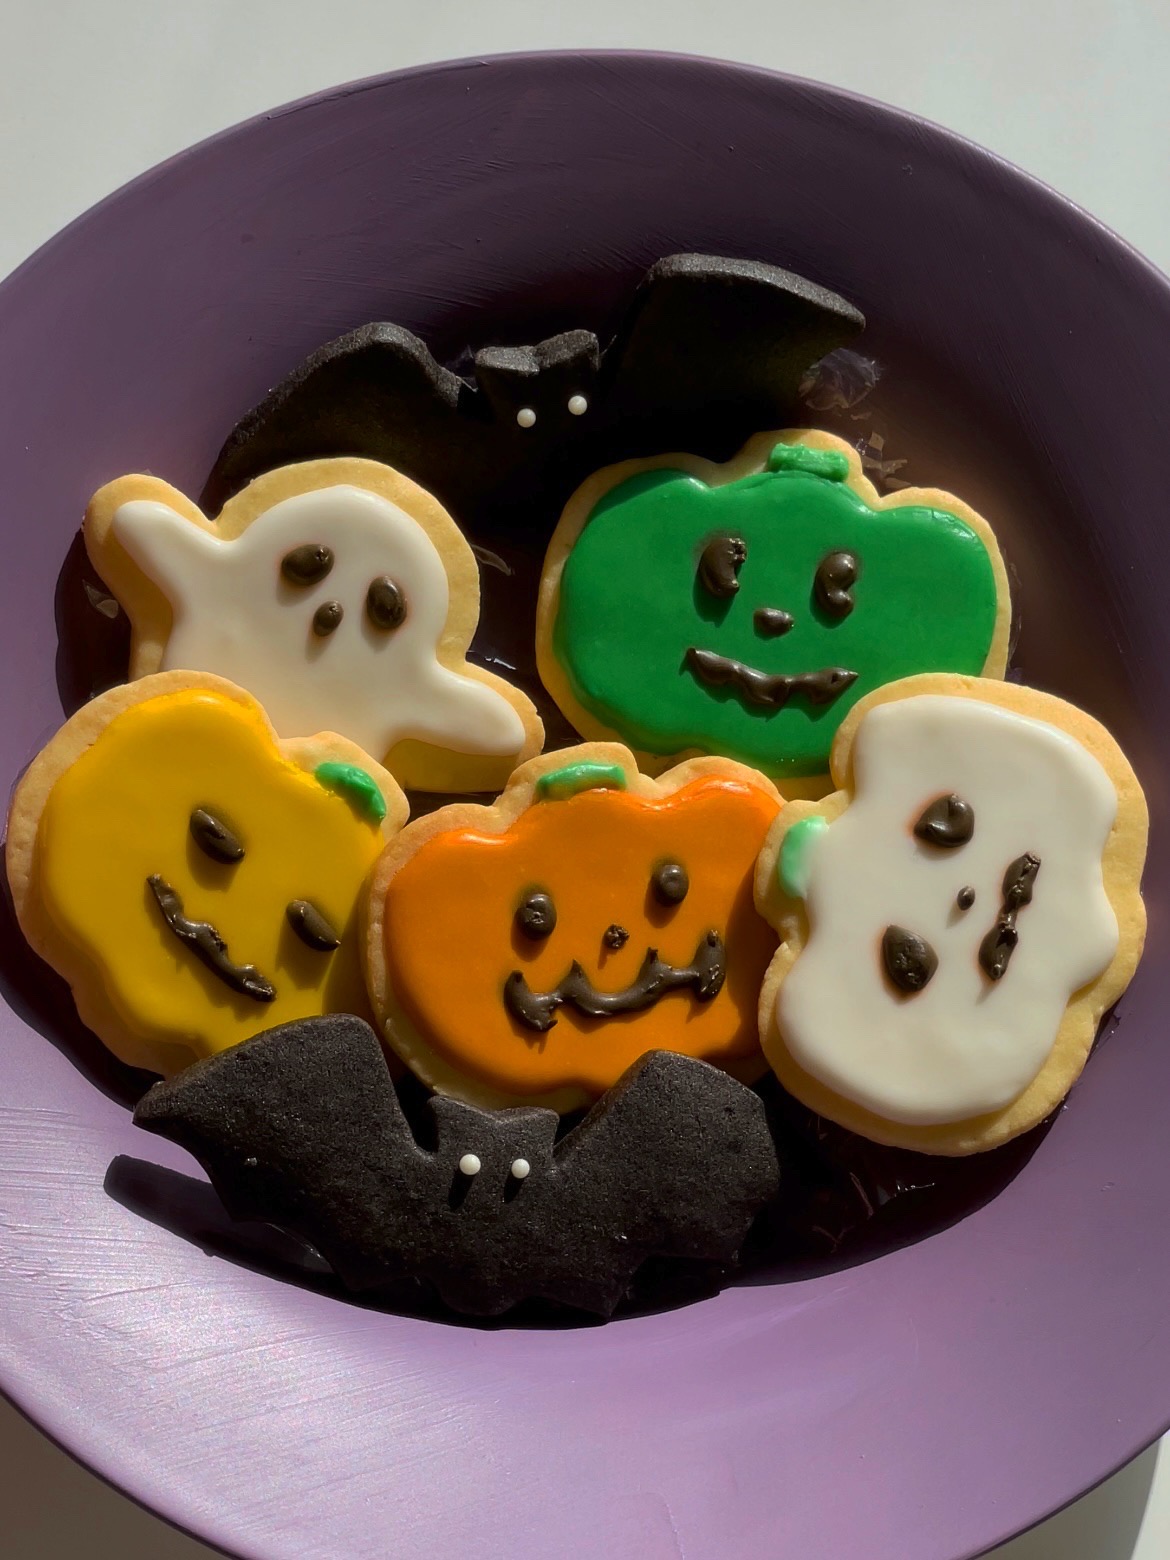
- Prepare the colors for the icing. We will need white for the bats, ghosts, and pumpkins, and yellow, orange, and green for the pumpkins. I made brown icing as well for the ghosts and pumpkins’ facial details, but you can also use melted chocolate instead!
- Start with the bats. They are easiest to do because it is simply two white dots. (You can add more to them if you like.) Next we will work on the ghosts. Pipe around the border of the cookies, leaving a gap of about 3mm. Fill in the icing. You can use a toothpick or other sharp tool to spread the icing around and shake to smoothen out. Let the base color dry before moving on to the face. Fill in the pumpkins in a similar way using their respective colors.
- Once the bases are dry, we can begin adding the details. Using the brown icing or melted chocolate, draw on the faces of the ghosts and pumpkins. You can use my picture as an example, or make any design you’d like. Before drawing the pumpkins’ faces though, mix some green and white for the pumpkin stems and use a toothpick or other sharp tool to place it where the stems of the pumpkins would be.
- Allow the icing to fully dry for a few hours, and the spooky cookies are done! 完成です!