Onigiri filled with just about anything your heart desires.
ABOUT ONIGIRI
Onigiri (おにぎり) is one of the most popular Japanese foods. They are rice balls made by filling Japanese rice with a salty or sour ingredient and squeezing it together into the shape of a triangle, sphere, or cylinder. Traditionally, onigiri was filled with salty and sour ingredients as a means to preserve rice. These days, you can use the fillings and a variety of seasonings to flavor the rice to your tastes. Many convenience stores in Japan also have a variety of fillings and flavors to choose from. I think that because onigiri is so easy to customize to different tastes, it became very popular worldwide. In fact, there are many restaurants in southern California (and maybe other places in America) that are dedicated to serving only onigiri. You can check out such restaurants, or you can make onigiri at home!
Making onigiri is super easy and it makes the perfect lunch or snack! I have fond memories of when I was younger making onigiri with my family and memories of packing onigiri in a bento for my boyfriend when I was in high school. It’s just rice but it’s filled with so many memories. Making onigiri can be a fun activity to do with friends or family, so I hope you can make many memories together! Below I’ve written the recipe for three of the most popular/common fillings. When you go to Japanese markets, for sure they will have these fillings as well. I’ve separated the instructions for each filling, so if you wish to make only one of the fillings you can easily find the instructions for just the kind(s) you want to make!
COMPONENTS OF ONIGIRI
- ☆ Rice: Steamed short-grain or medium-grain rice. The rice is seasoned with a little salt while forming the onigiri, but you can also mix other things into the short-grain rice as well, such as black short-grain rice to make purple rice or azuki beans to make sekihan. It is the main component of this dish, so feel free to customize it how you want!
- ☆ Filling: The filling is the main flavor of your meal; what you choose to fill the onigiri with will be the flavor for the onigiri. In this recipe, I share three popular onigiri fillings, but that doesn’t mean you must make these kinds. Other popular onigiri fillings include umeboshi, tarako, mentaiko, karubi, konbu, etc.! The possibilities are endless.
- ☆ Nori: Wrapping the onigiri with nori is optional. However, the types of onigiri I share in this recipe are typically wrapped with nori.
INGREDIENTS (+ SUBSTITUTIONS)
This is a basic list and explanation of the key ingredients. For full list and measurements, please scroll down to the recipe below!
- ☆ Short-grain or medium-grain rice
- I used a premium grade medium-grain rice, aka short-grain rice. I’m not sure how it will turn out if you use other kinds of rice, but it should be fine as long as it can stick together.
- ☆ Nori seaweed
- This is technically optional, but I recommend it!
TUNA MAYO (ツナマヨ) INGREDIENTS
- ☆ Tuna
- Typically we use canned tuna, but if you want fresh tuna, make sure it’s also about 85g in weight!
- ☆ Japanese mayonnaise
- Japanese mayonnaise is made using only egg yolks so it is smoother and richer in taste. If you can’t find any, you can make it yourself, or use American mayonnaise. To make American mayonnaise taste similar to Japanese mayonnaise, you can add a little rice vinegar and sugar to it. In this case for 3 tablespoons, 1.5 teaspoons rice vinegar and ½ teaspoon sugar, mixing until it’s all smooth.
- ☆ Soy sauce
- Soy sauce adds saltiness and umami. Because the soy sauce is pretty salty, you do not need to add any more salt! However, you can taste the tuna mayo mixture as you make it and add salt if you’d like it saltier.
- ☆ Dashi powder
- Dashi powder is completely optional, but I like to add it because it has an umami and almost smoky flavor that goes well with the tuna.
SALMON/SHAKE (鮭) INGREDIENTS
- ☆ Salmon filet
- For salmon, my favorite cut to use is salmon kirimi, a Japanese-style filet. However, any cut of salmon will do as we are simply grilling and breaking it apart. Unlike with the tuna, the weight of the fish here doesn’t matter, so feel free to use whatever is available to you!
- ☆ Sake
- Sake cleans the fish by removing the fishy taste and odor. This step is optional, so if you do not consume alcohol, you may skip this step. I would recommend thoroughly washing and drying off the fish with a paper towel instead!
- ☆ Salt
- The salt not only seasons the fish, but also helps to dry it out. The process of coating in salt and allowing the fish to dry removes the fishy taste of the salmon as well as enhances the umami flavors.
BONITO FLAKES/OKAKA (おかか) INGREDIENTS
- ☆ Bonito flakes
- Katsuobushi is made from skipjack tuna. It is dried then shaved into very thin flakes. If you can’t find bonito flakes, there are many substitutes online, but I’ve never tried them, so I can’t tell you which would be best.
- ☆ Sesame oil
- Sesame oil adds a rich and nutty taste to the bonito flakes as well as a toasty sesame flavor. I highly recommend it, but if you don’t have it, any finishing oil with a low smoke point should be able to provide the same richness.
- ☆ Soy sauce
- Soy sauce is the main flavoring for this filling. It adds saltiness and umami that goes well with the smokey bonito.
- ☆ Sugar
- It’s common to season with soy sauce and sugar in Japanese cuisine. Sugar brings sweetness while balancing the salty-sweet taste of the dish. We only use a little sugar in this recipe, so the overall flavor isn’t too sweet! You can substitute with any sugar of your choice.
- ☆ Sesame seeds
- Toasted white sesames for extra flavor. This is optional, so you can omit this!
HOW TO FORM ONIGIRI
1. Once the filling is completely encapsulated in the rice, we can begin forming the triangle shape of onigiri. Bend your hands where your fingers meet your palm to form a 90 degree angle.

2. Bringing your hands together perpendicularly, use one bend to form a point of the triangle and use the other to form the flat bottom of the triangle onigiri. Think of the top hand as a mountain peak and the bottom hand as the base of the mountain.

3. Lightly squeeze as you rotate. One hand should reinforce the corners of the triangle while the other hand maintains the thickness and flatness of the overall onigiri. For reference, this is how it should look from the side. In this photo, I am forming the onigiri corners in my left hand on the bottom. If it is easier, you can also mold onigiri in this way!

4. Be careful not to squeeze too hard as the filling may start to squeeze out and repeat with the remaining rice.
WRAPPING ONIGIRI
There are many ways to wrap the nori on the onigiri. In this post, I’ll describe two methods.
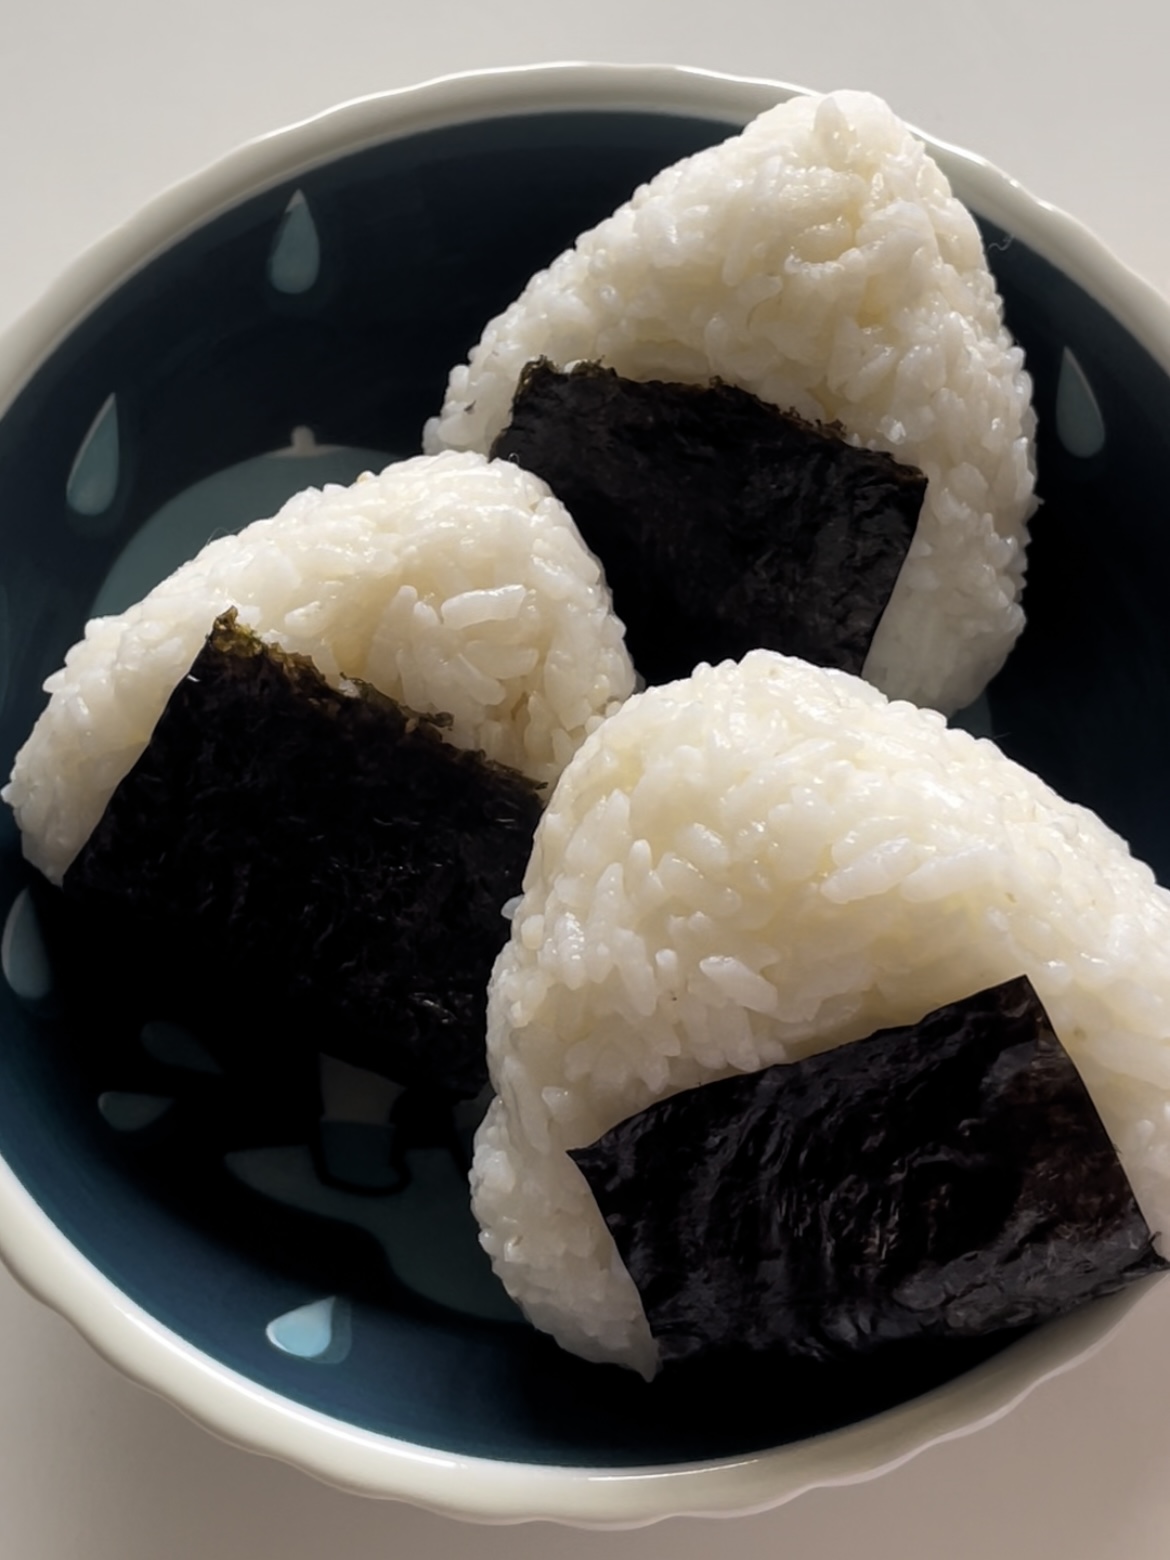
- ☆ The first method is maybe the kind most people are familiar with, with just a small strip of nori on the bottom. When you look up “onigiri” online, most of the image results show this way of wrapping.


- ☆ The other method involves wrapping the nori around the whole onigiri. The nori is wrapped overlapping each other and tucked underneath, resembling a tuxedo.


There are many ways to wrap onigiri. It all depends on your personal taste. Each method varies in the amount and placement of nori, so how much you like seaweed also factors into how you like to wrap it. Alternatively, you can serve the onigiri as is with the cut nori on the side so the nori remains crispy until ready to eat. I prefer to serve onigiri like this because I like the nori crispy and doing it this way lets everyone wrap the onigiri as they like it. You can experiment with a few different styles and see which you prefer!
TIPS FOR MAKING ONIGIRI
- ☆ Prepare the salmon a few days in advance of when you plan to make onigiri! It needs time to dry in the refrigerator. I recommend 12 hours minimum, but if you are in a pinch, leave the salmon uncovered in the fridge for at least 4 hours. Being uncovered will allow it to dry faster, but I don’t really recommend this as the texture and flavor may differ.
- ☆ Warmer rice sticks together easier, so it’s better to make onigiri when the rice is still warm. Let it cool down just a little, though, so you don’t burn your hands!
- ☆ If you have leftover onigiri, you can store it in the refrigerator. Tightly wrap the onigiri with plastic wrap until it’s airtight before you refrigerate. To reheat, you can simply microwave with a damp paper towel covering the onigiri. You can also eat it cold if you like!
MORE SAVORY JAPANESE RECIPES! ♡
If you recreate this Onigiri recipe, please let me know by tagging me or leaving a comment on Instagram @maruryouri or TikTok @atsuryouri. I’d love to see your creations and hear your feedback!

Three Popular Onigiri
Ingredients
- 400 g cooked short-grain rice or medium-grain rice about 2 rice cups uncooked
- 1 or 4 sheets nori seaweed
- salt
Tuna Mayo
- 1 can tuna in water 3oz/85g
- 1 tablespoon Japanese mayonnaise
- 1 teaspoon soy sauce
- ½ teaspoon dashi powder
Salmon/Shake (鮭)
- 1 salmon kirimi skin-on (Japanese-style filet)
- 1 tablespoon sake optional
- About 1 teaspoon salt
Bonito Flakes/Okaka (おかか)
- 1 handful about 6g bonito flakes (katsuobushi)
- ½ tablespoon sesame oil
- ½ tablespoon soy sauce
- 1 teaspoon sugar
- ½ teaspoon roasted sesame seeds
Instructions
Tuna Mayo
- Empty the whole can of tuna into a medium sized bowl. Lightly whisk with a fork to break up the chunks and to make the tuna a bit softer.
- Add the Japanese mayonnaise, soy sauce, and dashi powder and mix until fully incorporated. You can also add salt to taste, but personally this is salty enough for me.
- If this is the last or only filling you’ve made, proceed to the onigiri instructions. Otherwise, set aside for now.
Salmon
- Rinse the salmon filet to clean it and remove any bones. Pat dry thoroughly with a paper towel.
- Optional, soak salmon filet with sake in a deep plate for about 10 minutes. This will get rid of the fishy smell. After it has soaked, pat dry thoroughly with a paper towel. You can skip this if you don’t consume alcohol.
- Coat the salmon with the salt, focusing most of the salt onto the skin. Layer the salmon between two sheets of paper towel either in a container or on a plate. Cover and let dry in the refrigerator for at least 12 hours, but no longer than 36 hours.
- After the salmon has dried, place on an oiled sheet of aluminum foil on a baking sheet. Broil under high heat for about 10 minutes or until the skin is crispy. You can also bake at 400°F/200°C for 20 minutes.
- Let cool then flake the salmon apart using a fork or chopstick. If this is the last or only filling you’ve made, proceed to the onigiri instructions. Otherwise, set aside for now.
Bonito Flakes
- In a pan, crumble katsuobushi until the flakes are small. If you are using finer shaved katsuobushi, skip this step.
- Turn on the heat to medium heat and begin to toast the katsuobushi. Stir occasionally to evenly heat.
- Once the katsuobushi has toasted and dried out more, add the sesame oil and soy sauce. Stir around quickly to evenly distribute. The sauce tends to splatter if not mixed in fast enough, so be careful.
- Add the sugar and mix until evenly combined. Transfer the okaka to a small bowl. Add the sesame seeds and mix until evenly distributed.
- If this is the last or only filling you’ve made, proceed to the onigiri instructions. Otherwise, set aside for now.
Onigiri
- Wet your hands with water and rub a small dab of salt in your palms. Scoop about 50g of rice (⅛ of the total rice) into one palm and make a small dent in the middle of the rice using your other hand.
- Scoop about a tablespoon of the filling into the center and carefully bring the surrounding rice over the filling to close it inside.
- Bend both hands at the fingers to form a 90 degree angle. Bringing your hands together perpendicularly, use one bend to form a point of the triangle and use the other to form the flat bottom of the triangle onigiri.
- Lightly squeeze as you rotate. One hand should reinforce the corners of the triangle while the other hand maintains the thickness and flatness of the overall onigiri. Be careful not to squeeze too hard as the filling may start to squeeze out.
- Repeat with the remaining rice. The tuna mayo mix makes about 8 onigiri, using all 400g of rice. Both the salmon and okaka make about 4 onigiri each, using about 200g or 1 rice cup of rice, so adjust the amount of filling or rice you make as necessary.
- One way to wrap the nori on the onigiri is to take one sheet of nori and cut into 8 equal pieces by first cutting in half lengthwise then cutting each half into equal fourths crosswise. Place the bottom of an onigiri in the middle of the small strips and wrap both flaps upward on both sides of the onigiri. Repeat with the remaining onigiri.
- Another way to wrap the nori on the onigiri is to cut four sheets of nori in half lengthwise, giving you 4 equal sized pieces. Place the onigiri in the middle of the strip held horizontally so that the top and bottom line up with the edges of the nori. Fold one side diagonally across and repeat with the other side. Tuck the bottom flaps under and behind and repeat with the remaining onigiri.
- Once you’ve wrapped all the onigiri, the onigiri is done! 完成です!